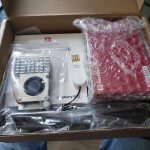
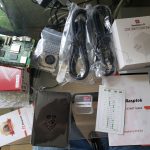
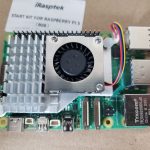
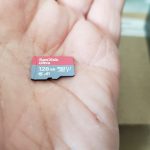
This is the latest “project”! I say “project” as I have no idea how things will work out. It arrived a couple of days ago. I’ll set it up and fiddle with it, see what I can do with it.
 |
 |
 |
 |
 |
 |
 |
 |
 |
 |
 |
 |
Any ideas?
projects on the go
This is the latest “project”! I say “project” as I have no idea how things will work out. It arrived a couple of days ago. I’ll set it up and fiddle with it, see what I can do with it.
 |
 |
 |
 |
 |
 |
 |
 |
 |
 |
 |
 |
Any ideas?
I was thinking of a title to give this.
We dug a hole to put the gravel and sand that will hold the concrete pads for the walkway. What on earth do you call that?
It never ends! More concrete, wood, and other building materials are gathering up. Time for a dump run.
To put up a fence, we have to create a walkway from the house to the rear. This means digging up earth, roots, rocks, foreign junk, and whatever else is in the way. Paving stones will be put in and will lead to the rear parking.
Holy crap, are there a lot of roots!
We’ve flagged it off and will try again another day.
Because the laundry machines had been changed in the rear suite, I had two new machines (well, new washer and almost new dryer) left over. I asked the tenants in the house if they wanted to swap them out. After discussing some details, here they are.
The washer has 5 years warranty, and the dryer has … not sure.
The tenant advised me that the bathroom light, out of the blue, stopped dimming. It wasn’t a big deal, said the tenant, but it was annoying nonetheless.
What the heck is this all about? If it dimmed before, and then stopped dimming, it must be an electronic issue.
I replaced the dimmer switch, and the problem persisted. The tenant suggested it might be a light fixture. One other tenant who shares rent attends university in Electrical Engineering and suggested it was the fixture. So a few weeks later I brought by a new light fixture.
Just in case, I also brought some dimmable bulbs. Before replacing the fixture, I thought I’d take a chance and replace the bulbs.
520 12C St N Lethbridge AB main 20240501_122405 bathroom light working (new dimmer bulbs).mp4
Ta-dah! Fixed!
Hmm. The tenant didn’t change the bulbs?
The doorbell quit! But I know why. It was a clearance item at Rona. When I installed it, I knew the button was sticky. So when someone pushed it, it activated the doorbell and ran forever until the thing died. Was it the transformer or the chime? Hard to say. But I replaced it all anyway.
In retrospect, sale items are not always a good purchase.