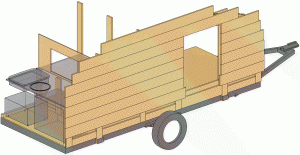
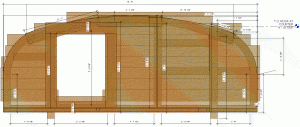
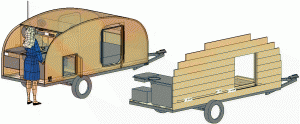
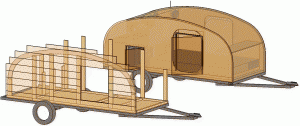
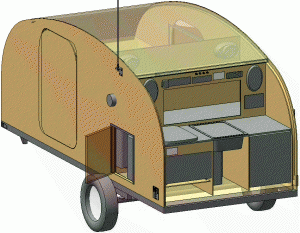
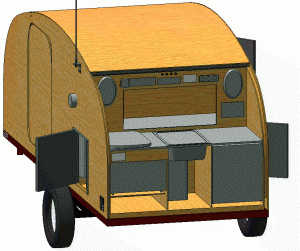
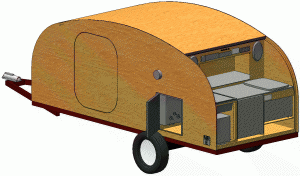
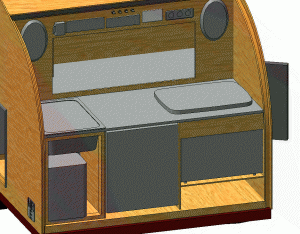
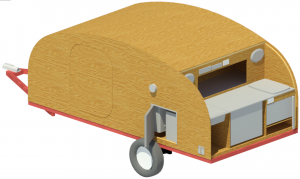
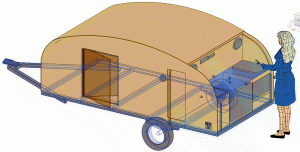
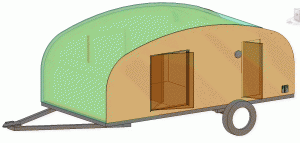
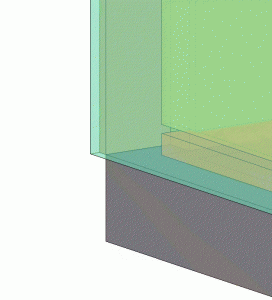
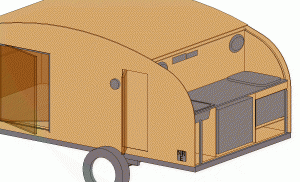
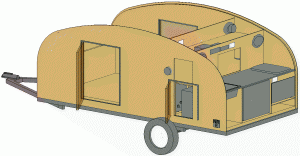
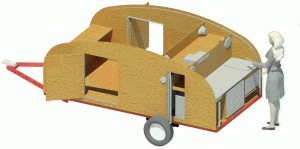
No pic here because there isn’t really anything visual to show. I have changed the wall heights and widths to match a change in construction. Rather than building the walls onto the floor, which would decrease the inner space width by a couple of inches, the walls are now to be built on the outside of the floor, resting on metal support brackets supplied with the trailer then anchored into the side of the floor structure’s 2×2 frame. This will add a couple of inches to the height of the wall, since it will sit lower.
Teardrop 1
Teardrop 1 018 4×10
I wanted to see how things would fit if I went with a 4×10 trailer instead of a 5×10. It all fits. I had to go with a smaller microwave. This saved me two inches that I could use to include the sink I have. Hmm. Spend $80 on a new (smaller) microwave or $150 on a new (smaller) sink. I went with smaller money – that is, smaller microwave and larger sink.
The trailer weights are similar. Comparison:
- 4×8 – FoldingTrailers.ca – trailer 260 lbs – load 920 lbs – $650
- 4×8 – Muddy Waters – trailer 260 lbs – load 1720 lbs – $675
- 5×8 – Inflatable Boat Warehouse and Folding Trailer – trailer 295 lbs – load 1695 lbs – $950
All can be expanded to 10 feet by not using the hinge feature. Not sure who will win out. I did purchase the 5×8 last night from Inflatable’s website, but they won’t get shipment in from their suppliers until the end of Nov. 2018, so I had to cancel the order. (Place Sad Face Here.)
Furthermore, I think the additional cost in materials – plywood, mainly – will necessitate going with a 4×8.
Plus, the Excel spreadsheet I have to calculate costs, weights, moments (weight distribution across the tires), and such is now geared for a 4×8 (that is, 4×10) trailer.
Here’s the latest.
I tried rotating the stove (cooker, stove top, hob, whatever you want to call it) to sit horizontal to the counter top. I thought that it would offer better cooking ability to have the burners side-by-side. But a) it doesn’t give enough clearance for the microwave shelf wall, and b) I think it takes up too much counter space.
I turned it back.
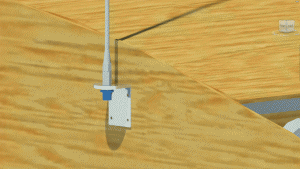
I created an antenna mount yesterday and put an antenna on it today. Pretty time consuming making Families for Revit. But I think it looks good. I also put this on my blog. See radio transceiver antenna mount.
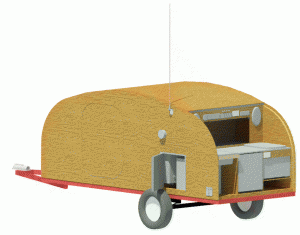
Teardrop 1 017 corrected walls, doors, roof
Things change. In this version, the walls are corrected. The arc was wrong on a couple of walls. Just cleaning up the drawing and correcting mistakes that I knew were there. The roof is on. Now I’m playing with the best way to represent wall and roof 1×4 and 1x6s in Revit. Expensive framing add-on to Revit? Manually sticking lumber wherever I need it? Is there something in the Structural menu that I can use? Still fiddling, still learning. Once these are accomplished in a satisfactory way, I can begin working on the actual drawings, with dimensions and such. From there, a bill of materials.
Teardrop 015 roof mass structure
In this design I tried to create, in Revit talk, a mass. It’s a volume of space (3-dimensional) that is not meant to be seen in any drawings but gives the designer a shape to work something else around, like a roof. I failed because of either a shortcoming in Revit or me, one that disallows masses to be extruded sideways (i.e. from one wall to the other).
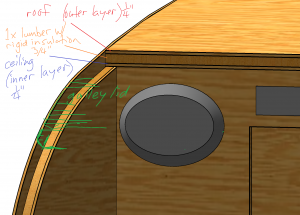
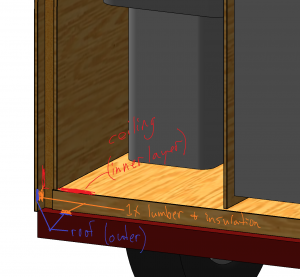
As it happens, I didn’t really need this. I could have just put a roof on an already existent structure – the walls – and offset the roof line by 1/4″ inch (so, in essence, drawing the ceiling line to make the roof). Why 1/4″? It’s the inner skin of the roof sandwich.
The inner 1/4″ ceiling plywood will be lain perpendicular to the walls, on the 1/4″ inner wall and 1×2 wall structure. This will give it enough roof surface area to firmly attach to the walls. 1×2 spars will follow atop the 1/4″ inner ceiling plywood and give the force necessary to keep the ceiling plywood curved around the walls, starting at the front wall, around the front curve, and over top the actual roof, to terminate at the galley – all colour-coded here for your convenience. Rigid polystyrene insulation will fill up the gaps between spars. (Spars not included in this drawing.)
I know what you’re going to say. “There seems to be a gap between the ceiling and the floor, in the second picture.” Yes. I have to fix my walls.
Teardrop 1 016 insulated floor
In this version, the floor is as others have suggested – an insulated floor. Previously I put the insulation panels between the trailer’s frame members. But:
- The steel cross members of the trailer are themselves not insulated and, being steel, will allow a lot of leakage of heat. Even if they were wood, they would still not insulate well.
- Adding insulation blocks under the trailer would not be fun. I really don’t want to crawl around under another camper ever again.
- Sandwiching (screwing & gluing) layers of plywood (top & bottom), lumber (1x2s & 1x4s), and rigid insulation panels would create a much stronger floor. In the corners, where the floor meets the trailer structure, there are bolts holding the trailer together. Drilling out bits of plywood to allow for flush contact will add serious weak points to a single sheet of plywood.
So this version has 3/8″ ply, 1×2 (which is 3/4″ thick), and another 3/8″ ply, totaling 1½”. This would raise the countertop by an extra inch, totaling 32”, a bit too high for my taste (30” max). The solution? Keep the counter at 30” and put in a smaller grey water holding tank (10ℓ).
Teardrop 1 014 less curved roof
This one shows a changed roof line again. Some bloggers say that a 4×8 piece of plywood can be bent to a 20-inch radius, and this is supposed to be a “teardrop” shape, so I’m going back to the curved front & rear ends.
In the process, the roof curve itself has been slightly straightened to allow a little extra height at both ends.
I created some door families. Wait – what?
At various points in this project, I created a few “families”. “You did what?” Rather than me explaining it, I’ll let Autodesk. I created:
- Allpowers 100W solar panel
- some 6×9 speakers (parametric for various plywood thicknesses)
- a horizontal GFI outlet
- a door
- some beaded pine plywood
- a mattress
- a sink (parametric) to match the one from the Sprite trailer or whatever sink might fit
- 4-inch water tanks also from the Sprite (Yes, they are actually 4″ tall.)
- a mousepad (to cushion the water pump)
- an Amarine Made AMBP1-G750-07 bilge pump
- fuse box R3-76 (in various rotations, with various mounting types)
- the NRE logo (twice)
- a SHURflo 4028-100-E54 water pump
- a few inverters (some nicer than others)
- Aqua Pak 10-litre water container
- Aqua Pak 20-litre water container (I couldn’t figure out how to parametric the 10-litre)
- Dometic SeaLand portable toilet (just the box shape, not details)
- a turntable to rotate the stereo
- a Reliance Desert Patrol Water Container, 23-L
- a Noria Window Air Conditioner
- a few microwaves (no details)
- a Marey GA5LP Gas Water Heater
- a Coleman Powerchill™ 40 Quart Thermoelectric Cooler
All of these are a little crude, but they suffice to add to the project. You’ll eventually see them included in the trailer. I want to make sure I’m not stepping on anyone’s toes legally speaking before putting pictures of them online.
