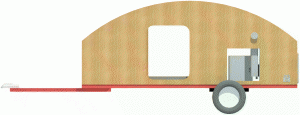
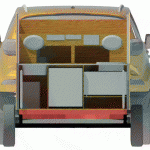
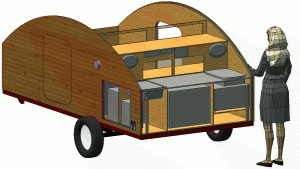
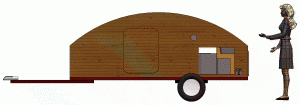
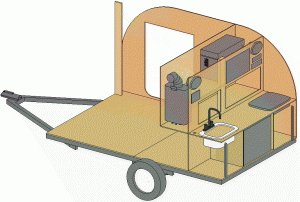
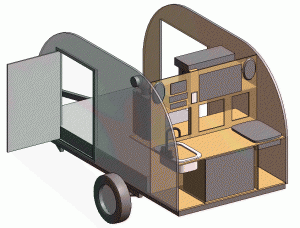
Teardrop 1 014 less curved roof

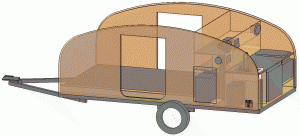
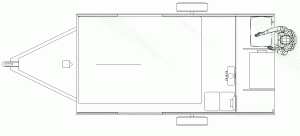
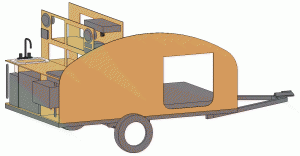
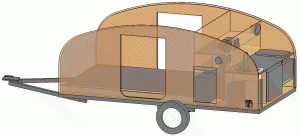
This one shows a changed roof line again.  Some bloggers say that a 4×8 piece of plywood can be bent to a 20-inch radius, and this is supposed to be a “teardrop” shape, so I’m going back to the curved front & rear ends.

In the process, the roof curve itself has been slightly straightened to allow a little extra height at both ends.

I created some door families.  Wait – what?

At various points in this project, I created a few “families”.  “You did what?”  Rather than me explaining it, I’ll let Autodesk.  I created:

  • Allpowers 100W solar panel
  • some 6×9 speakers (parametric for various plywood thicknesses)
  • a horizontal GFI outlet
  • a door
  • some beaded pine plywood
  • a mattress
  • a sink (parametric) to match the one from the Sprite trailer or whatever sink might fit
  • 4-inch water tanks also from the Sprite  (Yes, they are actually 4″ tall.)
  • a mousepad (to cushion the water pump)
  • an Amarine Made AMBP1-G750-07 bilge pump
  • fuse box R3-76 (in various rotations, with various mounting types)
  • the NRE logo (twice)
  • a SHURflo 4028-100-E54 water pump
  • a few inverters (some nicer than others)
  • Aqua Pak 10-litre water container
  • Aqua Pak 20-litre water container (I couldn’t figure out how to parametric the 10-litre)
  • Dometic SeaLand portable toilet (just the box shape, not details)
  • a turntable to rotate the stereo
  • a Reliance Desert Patrol Water Container, 23-L
  • a Noria Window Air Conditioner
  • a few microwaves (no details)
  • a Marey GA5LP Gas Water Heater
  • a Coleman Powerchill™ 40 Quart Thermoelectric Cooler

All of these are a little crude, but they suffice to add to the project.  You’ll eventually see them included in the trailer.  I want to make sure I’m not stepping on anyone’s toes legally speaking before putting pictures of them online.
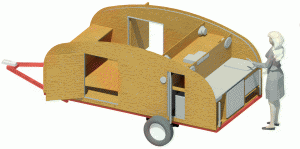
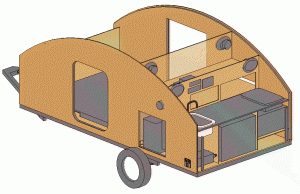
Teardrop 1 011 simplified roof

I thought of bending Plexiglas to create curved windows for the front and back tight-radius areas, buying bendable Luan panels from Windsor Plywood, and skinning the front with a metal rock guard.  In the end, I went with a simplified roof line – 2′ straight up, then a 7′-6″ radius for the roof.  (I can bend any piece of three-eights-inch plywood to that curve.)

At some point, I put speakers facing into the berth, a cabinet at the front of the berth, a mattress (53″ x 74½”, RV full size), and the NRE symbol at the rear.  The sink & stove are also facing lengthwise front-to-back again giving more counter space.  The stereo, CB, & solar controller continually move.  I had them anchored to various things before, but there’s no point in nailing anything down yet.

Teardrop 1 013 4×10

I went with a 4×10 trailer here to save money on materials.  5×10 would have demand more non-standard size material.  I put a car in front of it to see how things would feel.  I couldn’t find a 2012 Kia Soul in a BIM file anywhere, so I went with the Kia Sportage.  They’re roughly the same width and height, give or take.

This whole project is meat to come up with a build to easily be towed behind a little car.  I have a 2.0ℓ engine in my Soul.

Teardrop 1 012 lowered roof

I’m not sure why I decided to lower the roof. Just playing around, I guess. No, that’s not it. I’m going for aerodynamics, not full-size, full-featured. It’s a stretch wanting to put a water heater in it, but I have it, so there you go.

Of course, with the lowered roof line, everything has to move. A balance – lower the roof line, less fits. Raise the roof line, everything fits, but it looks like a big piece of plywood rolling down the road.

Teardrop 1 010 as 007 but 5×10

This is version 7 converted to a 10′ without all the other changes.  Thank goodness for Save As…

I also thought I’d have these doors open upward, so-called gull-wing doors.  It would:

  • shelter from the rain,
  • keep drops from falling into the cab, and
  • offer a roof for a shower area – just hang the curtain around the door (which is why the door is so wide).

Good, except that I’m taller than that.  I’d have to stoop way before I got close to the door hole.  Plus, it would add complexity to the door (piston to hold the door open).

Teardrop 1 009 10-foot

The answer, of course, is to make it bigger!  According to many, such as the author(s) of How To Build A Teardrop Trailer available on Wikibooks, it is easy to convert an 8-foot trailer into a 10-foot trailer.  Since this is not going to be a folding trailer as envisioned by the manufacturers of the trailer frame, the two side-by-side cross members for hinging together the trailer can instead be turned 90° and used to elongate and brace the outer frame members.  Still confused?  Have a look at the picture.

So now I have a 10′ trailer in the plans, giving me two 2′ sections to put stuff – one for the galley (fridge, stove, sink, microwave, etc.) and one for storage (water tanks, propane water heater [which now does not have to be any particular height], the portable toilet that everyone loves to put next to their food, and a bit of storage accessed inside the berth).

Teardrop 1 008 streamlined

Version 8 is geared to be a little more streamline.  It sits at 4′-7½” total height from the ground and includes a 12-inch radius curved cut front, roof, & rear.  No, the innards aren’t going to stick up like this.  But I want to get the shape right first.  That’s one of the few artistic expressions of teardrops – the shape.

This compromises available space in the galley.  Where will the water tanks go?  And the microwave?  They can fit down below.

The microwave will be at a less convenient level, but,

  • It won’t force the user to reach across 18 inches of counter top plus the depth of the microwave to get at food.
  • You won’t burn your arms reaching over top propane burners.
  • Kids can microwave popcorn.
  • I can microwave my coffee without raising my butt out of my chair.  How convenient.
  • Plus, there is a space for a drawer for pots & pans (well, perhaps only pans) under the microwave.  It also lowers the overall center of gravity by a smidge.

Benefits abound.

But it’s so dang wide!  The microwave is 19″ wide, and the fridge is 24″.  That doesn’t leave much.  What to do, what to do.

teardrop 1 007 wall studs, insulated floors

Nothing really new to report here.  I tried a few things, moving various parts around.

Where do I put the water tanks?  In this version, there is a fresh water tank on the right (passenger) side and grey water under the sink on the left.  To have the water tanks fit, the counter top needs to be raised to more than 3′-2″ from ground level.  How high is your stove & sink at home?  I bet it’s not that high.  People usually bring their kids camping.  Do they have to stand on something?  Unsafe.  I did the scientific tape-on-the-door method to get a proper feel for the heights of various components.

<sorry, pic missing>

Does the grey tank have to be the same size as the fresh?  I should think not.  The 20ℓ Aqua Pak tank from Canadian Tire is good for fresh, but I doubt very much the grey water needs to be more than 10ℓ.

Again, I didn’t get carried away with wall studs yet because I’m not entirely satisfied with the overall shape yet.  No wall studs done.

Teardrop 1 006 change 4 to 5 feet wide

This is changed to a 5-foot wide trailer.  As one online comment states, what is the point of building a trailer if you’re not comfortable in it?  Go for the extra width.

The sink & stove are placed wider the way you’d expect them to be.

I began to place 1×2, 1×4, & 1×6 boards to see what the framing would look like.  But something just doesn’t feel right.  It’s 5 feet wide, 8 feet long, and 5 feet tall.  Rather boxy.  Not a fan.

Teardrop 1 005 separate components

Version 1.5 separates things that should be separate. The fridge in the middle means it cannot vent to the side, but it also means there can now be two supports for the counter top on either side of the fridge. The stove & sink are both inserted with their lengths placed front-to-back. What can you do with a 4-foot wide trailer?